
Quick Tip: How to Use Power Automate for Tweet Notifications
Are you having trouble keeping up with the massive number of notifications you’re receiving from accounts you follow on Twitter? Office 365 and Power Automate have a solution that can help.
If you can say “yes” to any of the below questions, Office 365 and Power Automate have a solution that can help:
- Are you having trouble keeping up with the massive number of notifications you’re receiving from accounts you follow on Twitter?
- Are Twitter updates on your smartphone or desktop becoming even more overwhelming now that you’re working from home?
- Is it becoming difficult to sort out the important Twitter posts you need to know about from the rest?
- Have you decided to forego using a live Twitter client because it’s too much of a distraction, but are now missing out on important updates you need to see?
With this solution, you can:
- Receive an automated email notifying you of new tweets from a specific Twitter account, with only the information you need.
- Set up rules in Outlook to sort these emails into a specific folder so your inbox doesn’t get filled up.
- Use Outlook to search this folder for keywords in tweets, to further narrow down the ones you need to see the most.
How to set up Twitter notifications in Microsoft Office 365 and Power Automate
Fortunately, the solution here is quite simple. It is required that you have a Twitter account available to create a connection to Office 365, so the application can retrieve the information it needs. If you have that, great. Here’s how to set it up.
Step 1: Create an automated flow
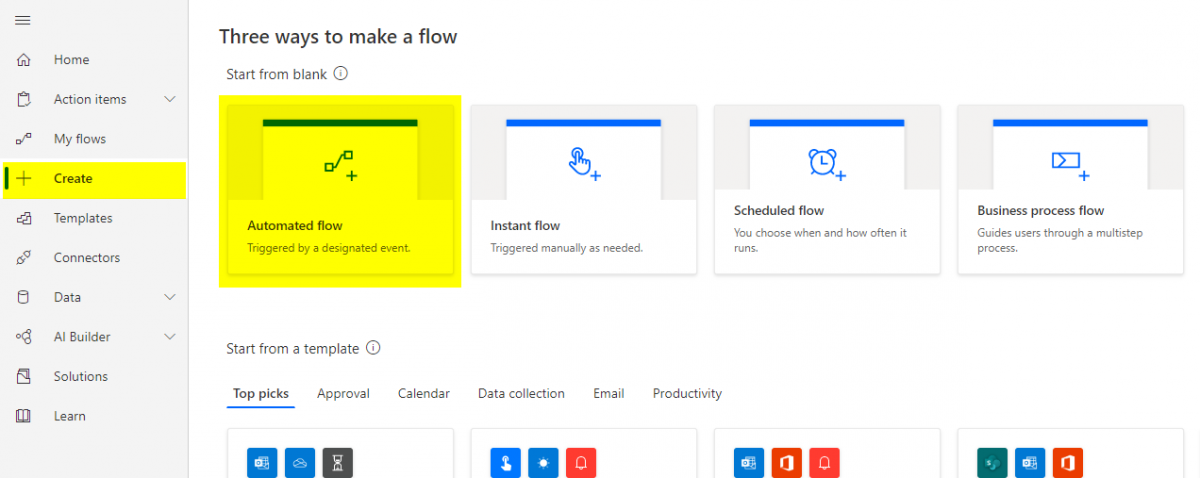
First, select Power Automate from the Office 365 menu. (Fun fact: this is sometimes referred to as the “waffle.”) Then, select Create and Automated flow.
Step 2: Select the Twitter new tweet trigger for the flow

Next, you need to name your automated flow. Type in a name that makes sense and will allow you to locate it easily later, in the event it needs editing. Then, type “twitter” into the search box and select the “When a new tweet is posted” trigger.
Step 3: Input the Twitter account for which you would like notifications
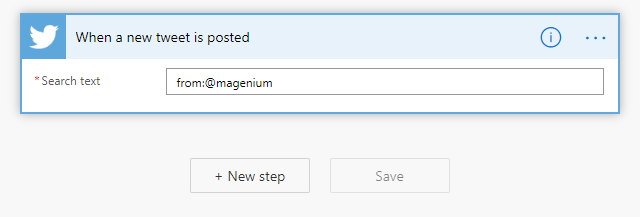
Power Automate now allows you to enter a specific Twitter account in the search text box, rather than a keyword. It looks like this:
from:@twitteraccount
What this accomplishes is the ability to set up a flow to send you (or whomever) an email every time a new Tweet is posted from that account. Add another step to continue.
Step 4: Create the email action
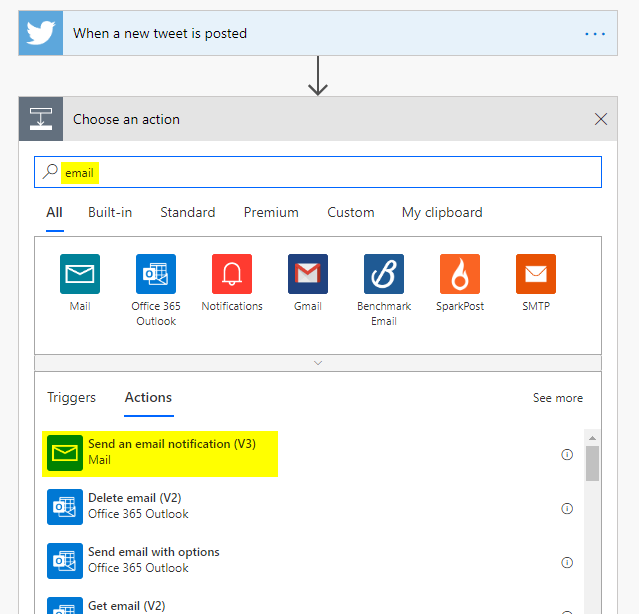
In this step, type “email” or “mail” into the box. This will bring up a list of actions to complete when the criteria for the trigger is fulfilled (a new tweet is posted by the account identified.) Select “send an email notification.”
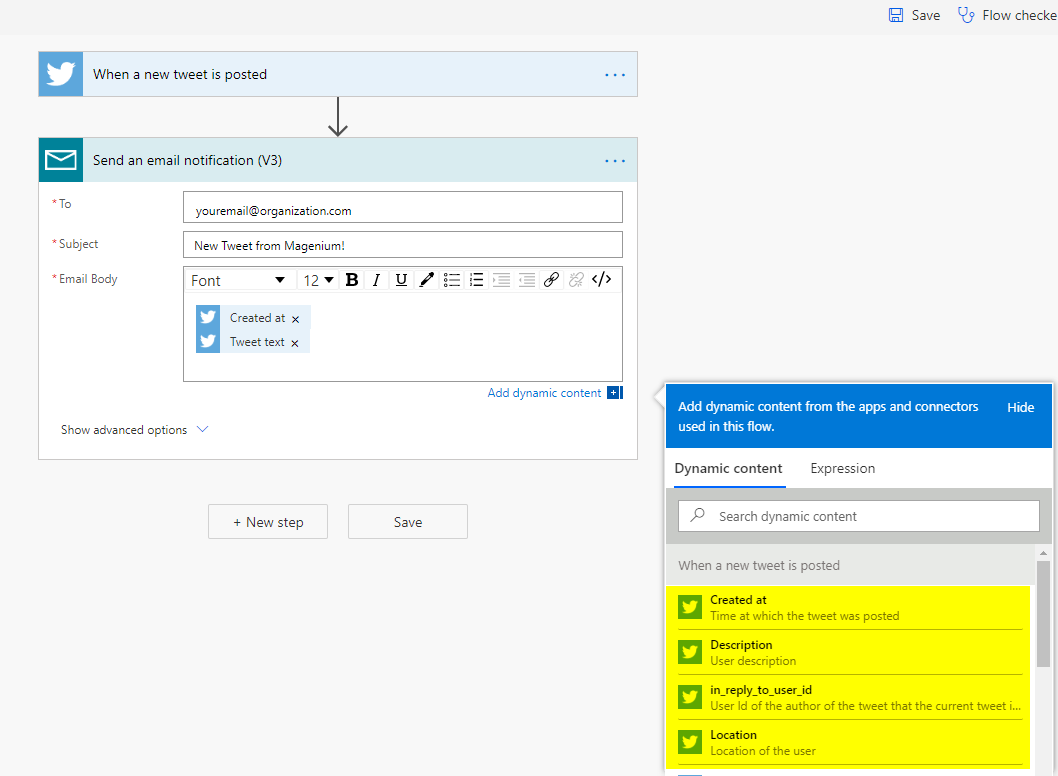
Once this is complete, you will have to input your email address into the To: field which should auto-complete. Fill out the subject line as desired, something that you will recognize such as “New Tweet from MyFavoriteAccount”.
Finally, select the dynamic content you wish to include in the body of the email. There are many selections that Power Automate provides, but I prefer the simplicity of including the date, text copy of the Tweet, and the account in the email.
What next?
At this point, the basic setup is complete. You will now want to test the flow for any errors, and then set the flow to run.
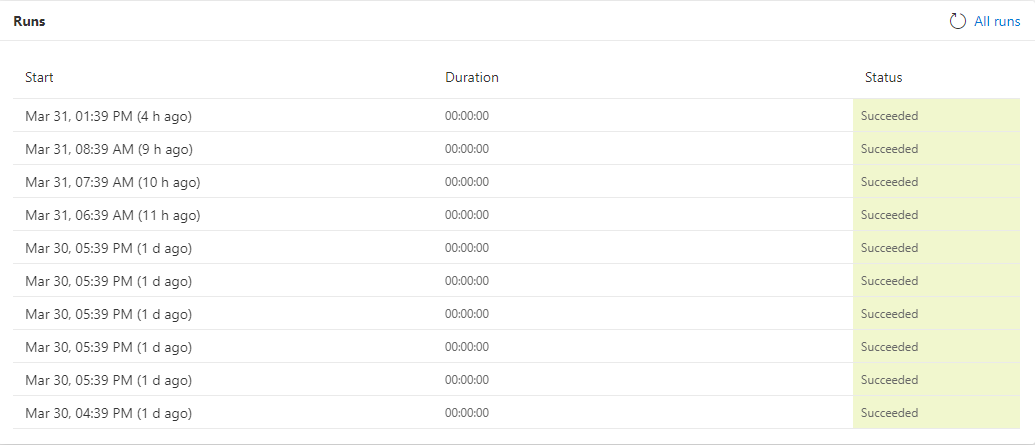
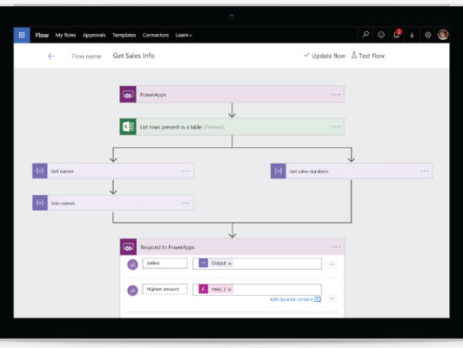
You’ll know when it’s successful if you check the main page for the flow, where you can verify successful runs.
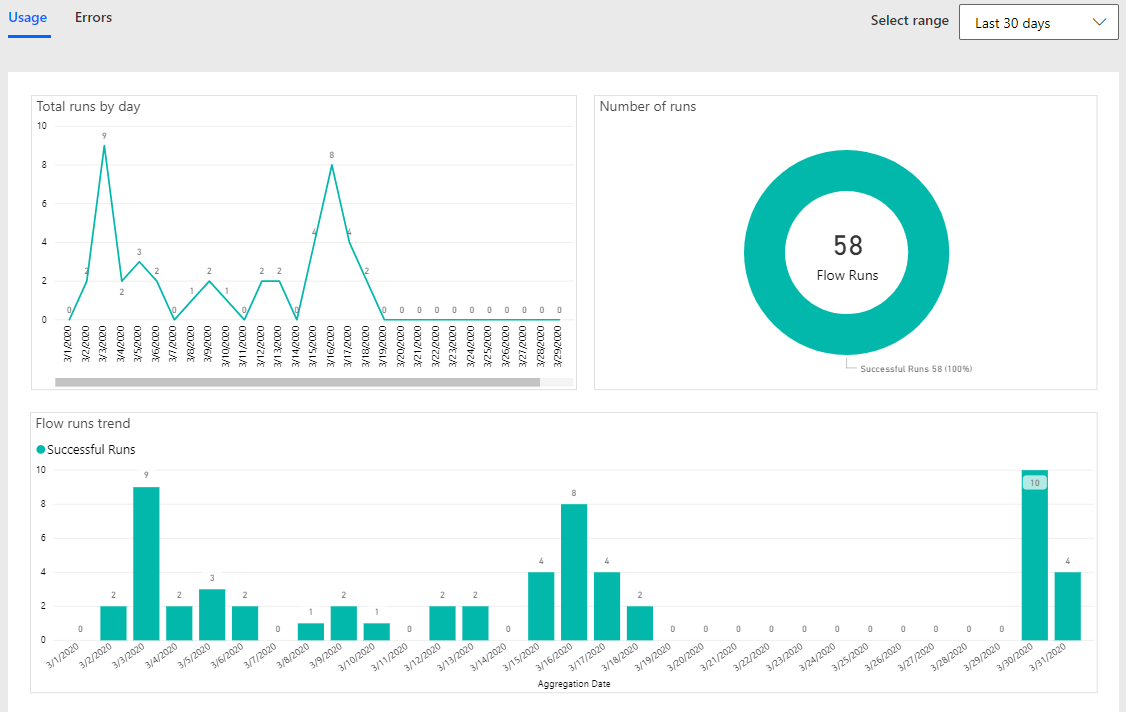
You can also test the flow later using previous runs or turn it off completely. It’s even possible to see a visual history of the flow’s activity using Power BI!
One important thing to remember about this tip is that if the Twitter account is high volume, you’ll likely be inundated with emails. Rules in Outlook can easily work around this by depositing the emails into folders you specify, avoiding inbox clutter. Plus, you can search for keywords in that folder using Outlook Search to narrow down the notifications if you choose to go this route. The upside is that you will be notified of everything that account posts, the downside is that you will have to manage those emails.
However, you also have the option of making the flow more complex if you would like it to be more specific. For example, adding Conditions based on “Tweet text” for specific keywords in the body of the tweet. You could set up a push notification instead of an email. The possibilities are almost limitless, and you can also find tons of pre-made flow templates that will do the heavy lifting for you as well.
Happy automating! Want to learn more about Power Automate? Contact us below: